
iPhone 18 Pro Pro Controls Explained: How to Use the New Manual Camera Features
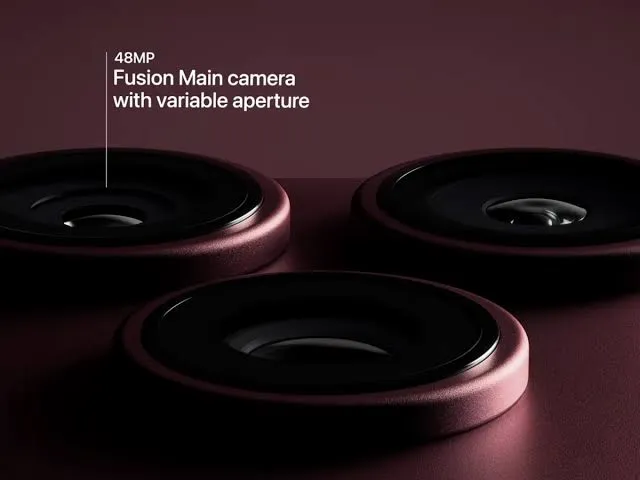
The iPhone 18 Pro gives photographers more control over the camera than previous iPhones.
Apple's new Pro Controls experience lets you adjust settings such as aperture, shutter speed and white balance, while a built-in histogram helps you judge exposure before taking a shot. You can also bring the settings you use most often to the top of the Camera app for quicker access.
The controls are particularly interesting because the iPhone 18 Pro has a 48MP Fusion Main camera with a physical variable aperture. You can choose between ƒ/1.48, ƒ/1.8, ƒ/2.8 and ƒ/4.0 instead of leaving aperture selection entirely to the automatic camera system.
Here's what each Pro Control does and when you should use it.
What are iPhone 18 Pro Pro Controls?
Pro Controls is a new customizable camera interface for the iPhone 18 Pro and iPhone 18 Pro Max.
It gives you access to four main manual controls:
Aperture
Shutter speed
White balance
Histogram
Apple also lets you bring your most-used settings closer to the top of the Camera app so they're easier to reach while shooting.
The idea isn't to make every iPhone owner shoot like a professional photographer.
You can continue using the automatic camera mode.
Pro Controls simply gives you more say over what the camera does when you want a specific result.
Which iPhone 18 Pro camera controls can you adjust?
Control | What it changes | Useful for |
|---|---|---|
Aperture | Light and depth of field | Portraits, groups, low light |
Shutter speed | How long the sensor captures light | Motion, action, creative blur |
White balance | Color temperature | Indoor lighting, mixed light |
Histogram | Exposure information | Avoiding overexposure and underexposure |
The iPhone 18 Pro's Main camera supports four physical aperture settings, while shutter speed and white balance give you additional control over how the final image looks.
How to use aperture control on iPhone 18 Pro
Aperture is one of the biggest additions to the iPhone 18 Pro.
The 48MP Fusion Main camera has four aperture settings:
ƒ/1.48
ƒ/1.8
ƒ/2.8
ƒ/4.0
Apple can select the aperture automatically based on lighting and depth-of-field requirements, but Pro Controls gives you the option to choose it yourself.
What does ƒ/1.48 do?
ƒ/1.48 is the widest aperture available on the Main camera.
A wider aperture allows more light into the camera.
That makes it useful for:
Night photography
Indoor scenes
Restaurants
Concerts
Evening portraits
Other low-light situations
Apple says the ƒ/1.48 setting provides around 50% better low-light performance and allows higher-quality Night mode photos to be captured faster.
If you're shooting in a dark environment, this is generally where you'd want to start.
What does ƒ/1.8 do?
ƒ/1.8 is the default aperture.
It's designed to balance light gathering and depth of field, making it a good general-purpose setting.
For everyday photography, this is probably the aperture you'll use most often.
What does ƒ/2.8 do?
Moving to ƒ/2.8 narrows the aperture.
That reduces the amount of light entering the lens but increases depth of field.
In simple terms, more of the scene can remain in focus.
This can be useful when you're photographing a group of people or a subject where you want some additional background detail.
What does ƒ/4.0 do?
ƒ/4.0 is the narrowest aperture available on the Main camera.
Apple describes it as the maximum-depth setting.
It's useful when you want more of the scene in focus and can also create creative effects around bright light sources, such as a starburst effect.
Which aperture should you use?
A simple starting point is:
Situation | Suggested aperture |
|---|---|
Dark indoor scene | ƒ/1.48 |
Night photography | ƒ/1.48 |
Everyday photography | ƒ/1.8 |
Portrait with some background detail | ƒ/1.8–ƒ/2.8 |
Group photo | ƒ/2.8 |
Landscape with more depth | ƒ/4.0 |
Starburst effect around lights | ƒ/4.0 |
These aren't hard rules.
The right aperture depends on the available light, your subject and the look you're trying to create.
That's the advantage of having the choice.
How to use shutter speed on iPhone 18 Pro
Shutter speed controls how long the camera sensor captures light.
A faster shutter speed freezes movement.
A slower shutter speed allows more movement to appear as blur.
Apple specifically demonstrates Pro Controls being used to adjust shutter speed and create artistic motion blur while keeping the main subject sharp.
Fast shutter speed
A fast shutter is useful for:
Sports
Children running
Pets
Cars
Birds
Dancing
Other fast-moving subjects
If your subject is moving quickly and appears blurry, a faster shutter speed is one of the first settings to consider.
Slow shutter speed
A slower shutter can produce intentional motion blur.
For example, you could use it to capture:
Moving people
Traffic
Water
Light trails
Moving objects
The result can make a static photo feel more dynamic without relying on an artificial effect.
The trade-off is that camera shake becomes more noticeable as the shutter stays open longer.
Shutter speed and low light
Shutter speed becomes particularly important at night.
A slower shutter lets more light reach the sensor.
That can produce a brighter image, but there's a catch: movement can become blurred.
A faster shutter reduces motion blur but allows less light.
This is why photography is often about finding a balance rather than simply choosing the brightest possible setting.
The iPhone 18 Pro can automatically handle this for you, but Pro Controls lets you make that decision yourself.
How to use white balance on iPhone 18 Pro
White balance controls the color temperature of your image.
Different light sources have different color temperatures.
For example:
Daylight can look relatively neutral.
Indoor tungsten lighting can look warm.
Some fluorescent or LED lights can produce cooler or unusual tones.
If the colors in your photo look too warm or too cool, adjusting white balance can help.
Why white balance matters
Imagine taking a photo inside a room with warm yellow lighting.
The camera's automatic processing may correct much of that color cast.
But sometimes you may actually want to keep some of the warmth.
With manual white-balance control, you have more say over the final appearance.
This can be useful for photographers who want consistent color across a series of images.
White balance for consistent photos
White balance becomes particularly useful when shooting multiple photos under the same lighting.
If you're photographing a product, event or scene and want every image to have a similar color balance, keeping your white balance consistent can make editing easier later.
This is one reason manual controls are useful beyond simply creating unusual effects.
They give you consistency.
What is the histogram on iPhone 18 Pro?
A histogram is a graph that shows how brightness is distributed throughout an image.
You can think of it as an exposure guide.
The left side represents darker tones, while the right side represents brighter tones.
A histogram heavily weighted toward the left means the image contains a lot of dark information.
A histogram pushed heavily toward the right means there are many bright areas.
The iPhone 18 Pro lets you use the histogram through Pro Controls to check exposure levels across the scene.
How to read the histogram
You don't need to become a photography expert to get useful information from it.
A simple approach is to watch the edges.
If important highlights are pushed hard against the far right side, you may be losing detail in those bright areas.
If important shadow information is pushed hard against the far left, you may be losing detail in dark areas.
The histogram doesn't tell you what the photograph should look like.
It simply gives you another way to judge the exposure.
That's particularly useful when the screen itself is difficult to judge because you're shooting outdoors in bright sunlight.
Can you use Pro Controls for video?
Yes.
Apple lists Pro Controls for video as well as photography.
The same control group includes:
Lens aperture
Shutter speed
White balance
Histogram
The iPhone 18 Pro also supports professional video features such as ProRes RAW, Apple Log 2 and Genlock.
This makes the manual controls more useful for creators who need consistent settings between shots.
Aperture control for video
The variable aperture can also affect video.
Apple says the iPhone 18 Pro can automatically adjust aperture and frame rate for low-light video to produce brighter, clearer footage.
With manual control, creators have more say over the look of the footage.
For example, you may want to maintain a particular aperture throughout a sequence rather than allowing the camera to change it automatically.
That's particularly useful when you're trying to keep the appearance of multiple shots consistent.
Shutter speed for video
Shutter speed can have a major effect on how motion looks in video.
A very fast shutter can make movement appear unusually sharp or stuttery.
A slower shutter can create more natural-looking motion blur.
For professional video, shutter speed is often considered alongside frame rate rather than in isolation.
The iPhone 18 Pro gives creators access to this setting through Pro Controls, which means you don't have to leave the decision entirely to automatic exposure.
White balance for video
Manual white balance is especially useful when shooting video.
Imagine recording a scene inside a room and then moving outside.
If the camera changes its white balance dramatically during the transition, the color of the footage can shift noticeably.
Manual control can help maintain a consistent color temperature throughout a shot when the lighting conditions are predictable.
That's useful for:
Interviews
Product videos
Short films
YouTube videos
Events
Multi-camera productions
Pro Controls and the 48MP Main camera
The variable aperture is what makes Pro Controls particularly interesting on the iPhone 18 Pro.
The Main camera isn't limited to a single physical aperture.
It can switch between:
ƒ/1.48 → ƒ/1.8 → ƒ/2.8 → ƒ/4.0
Apple says the camera can make these changes automatically, but users can also control the aperture manually.
That gives photographers something they haven't had on previous iPhones in this form: direct control over the physical aperture of the Main camera.
Pro Controls vs automatic camera mode
You don't need to use Pro Controls all the time.
In fact, most everyday photos are probably better left to the automatic system.
Automatic mode can make decisions about exposure, focus, aperture and other settings without requiring you to think about them.
Pro Controls becomes useful when the automatic result isn't giving you the look you want.
For example:
Automatic mode:
You're taking a quick photo of your family.
Pro Controls:
You're photographing a moving subject and want to control motion blur.
Automatic mode:
You're taking a normal outdoor photo.
Pro Controls:
You want to deliberately use ƒ/4.0 to increase depth of field.
The feature is there when you need it, rather than something you have to use for every photo.
Best iPhone 18 Pro Pro Controls settings for beginners
If you're new to manual photography, don't change everything at once.
Start with one setting.
Step 1: Try aperture
Experiment with ƒ/1.48, ƒ/1.8, ƒ/2.8 and ƒ/4.0.
Photograph the same subject at each setting.
Look at how the background and overall exposure change.
Step 2: Try shutter speed
Photograph a moving subject.
Take one photo using a faster shutter and another using a slower shutter.
You'll quickly see how motion changes.
Step 3: Try white balance
Take the same photo under warm indoor lighting using different white-balance settings.
You'll see how much the color temperature affects the image.
Step 4: Turn on the histogram
Start watching the histogram while changing your exposure.
You don't need to understand every detail immediately.
Just get used to checking whether important highlights or shadows are being pushed too far toward the edges.
Pro Controls are not just for professionals
The name might make the feature sound intimidating.
It really isn't.
You can start by changing just one setting.
Aperture is probably the easiest place to begin because the iPhone 18 Pro gives you four clearly defined options.
Try ƒ/1.48 for a darker scene, ƒ/1.8 for general photography and ƒ/4.0 when you want more of the scene in focus.
Once you're comfortable with that, experiment with shutter speed.
You don't need to understand every traditional photography concept before using these controls.
iPhone 18 Pro Pro Controls: What can you adjust?
Here's the quick summary:
Pro Control | Main purpose | Best use |
|---|---|---|
Aperture | Controls light and depth of field | Portraits, low light, landscapes |
Shutter speed | Controls motion and exposure time | Sports, action, motion blur |
White balance | Controls color temperature | Indoor lighting, video |
Histogram | Shows exposure distribution | Exposure checking |
Apple also lets you customize the Camera app so your most-used settings are easier to access.
Are iPhone 18 Pro Pro Controls worth using?
If you normally point and shoot, you don't need them.
The automatic camera system will continue doing most of the work.
But if you want more control over the way your photos and videos look, Pro Controls are one of the more meaningful camera additions on the iPhone 18 Pro.
The variable aperture gives you physical control over the Main camera's depth of field and light gathering.
Shutter speed lets you decide how motion appears.
White balance gives you more control over color.
And the histogram gives you another way to judge exposure.
Together, these controls move the iPhone 18 Pro closer to the kind of manual control photographers expect from dedicated cameras.
You don't have to use all of them.
Start with one setting, see how it changes your photos, and add more controls as you become comfortable with them.
For the complete hardware breakdown, see our iPhone 18 Pro camera specs guide. If you want to understand the biggest new feature behind Pro Controls, our iPhone 18 Pro variable aperture guide is the natural next read.
Comments
No comments yet — be the first to comment.